Custom Navbar

Friday 27 June 2014

Giveaway: Win $10 towards any necklace at Eternal Girl (CLOSED)


Hey guys! So the lovely Julia who runs the Etsy shop Eternal Girl has generously offered to donate a $10 gift voucher towards any necklace from her shop. Julia's shop has lots of great designs just like the ones pictured above. Click here to see them. Julia also has her own blog which you can see here. There are so many different designs in Julia's shop including zodiac signs, animals, flowers, and even Harry Potter and Adventure Time themed necklaces for you to choose from if you win. Just so that you are aware, the necklaces in Julia's shop range from about $15-$18 so the $10 gift voucher won't cover the full cost of a necklace but if you would love one of these lovely necklaces with $10 off the price, then this giveaway is perfect for you.
The giveaway will end at midnight on the 21st of July and I will notify the winner by email within 24 hours after it ends. Good luck to everyone!

a Rafflecopter giveaway

Wednesday 25 June 2014

Starting a Blog: Create and Add a Blog Header (Blogger)

Hey guys, so because I'm not that great at things like advanced blog design and html, and probably a lot of you aren't either, I thought that I would make a series of how to easily improve your blog. Today I want to show you how easy it can be to create and add a header to your blog if you've just started a blog and don't really know what you are doing yet. I know that some people are amazing at designing headers in photoshop and other things like that but this tutorial is for pretty much beginners who haven't figured out that type of stuff already. This is a tutorial for Blogger and it is the easiest way to create a header for beginner bloggers. 

1. The first thing you are going to do is find a free header template for your blog so just type "free header template for blogger" into Google. The first thing that came up for me was a site called The Cutest Blog On The Block which has loads of amazing header templates for you to choose from. If you don't like any of the header templates on this site then there are plenty other free templates on other sites so keep looking through Google.


Some of the types of headers you can get on this site:
2. Once you have picked you header, click on it. Make sure to click on the full sized image before you right click on it and choose "save image as".
3. Once you have saved the image, you are then going to edit it with a program like Photoshop or Paint. Because this tutorial is the simplest and most accessible way to create a header, we are going to use Paint. Go into Paint, click the little blue menu button at the top, chose open, and pick the header template that you saved earlier from your files.

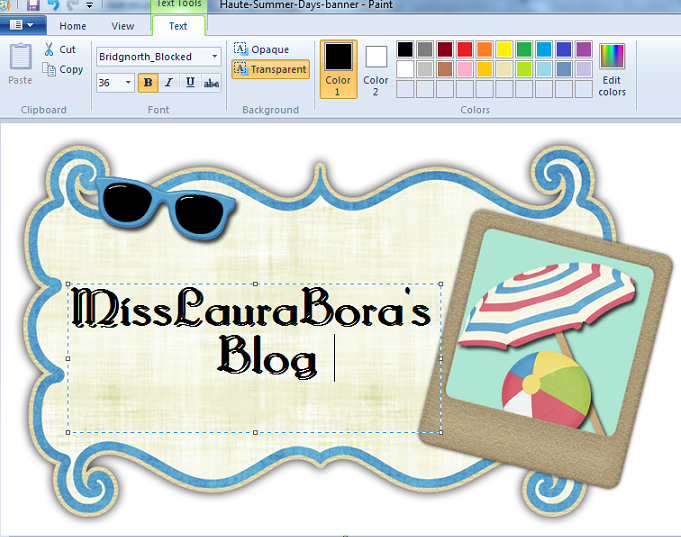
4. Once the header template you choose is open in Paint, click on the Text button which is circled below.

5. Now you can choose whatever font and size you want to write the name of your blog on the template, as shown below. You can also add some shapes or hearts from the home tab if you would like.You may also want to resize your template so that it will fit your blog better. If your header is very small, it might show up more on the left of your blog, but if you make it bigger it will help center the header more. My blog header is 849x417 which is at least the size you should be aiming for but it is up to you. Once you are happy with your header click save.

6. To add the header to your blog, sign in to blogger and click on the blog that you want to put the header on. Then go to layout as shown below.
 7. When you are in layout, click edit on the Header gadget near the top of the layout page like below.

 8. When you click edit, a new window will open titled Configure Header. You can choose an image from the web or from your computer. Click the one for your computer. You will also have the option of choosing if you want to put your image behind a title and description for your blog, a description placed after the image or have your image instead of a title and description. I chose to have my image instead of a title and description because my image already has my blog name on it and I don't think it looks as nice with a title and description in front or behind it. You can also choose to shrink the picture to fit your blog. I don't usually choose this and if you have made your header the right size, you shouldn't have to.Then click choose file from your computer to upload the image.
9. I don't have a test blog so I will be uploading the header image that have already made for my blog in Photoshop just to show you the last few steps. Click the image you want from your files.
 10. It will then load for a moment as shown below.
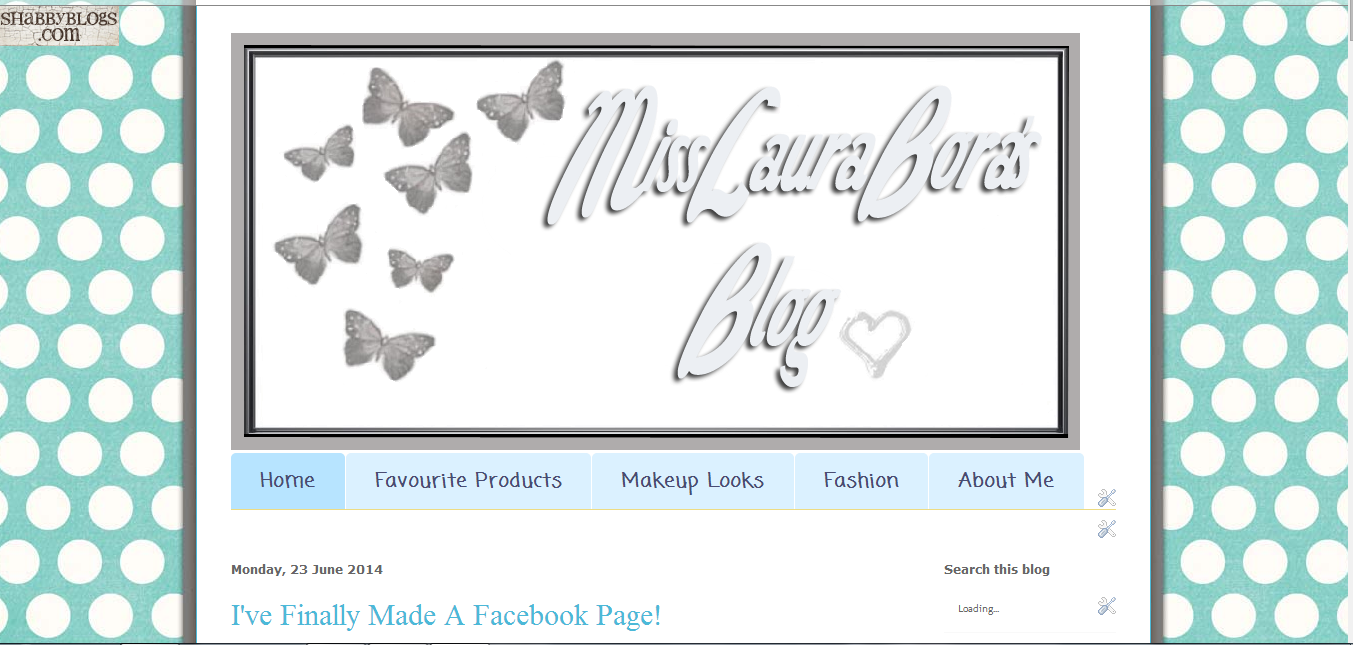
 11. Now your image is uploaded. Click save, and then go to view blog so that you can see how your new header looks. If your new header isn't the right size, first try upload again and click shrink to fit. If it still isn't right, then resize the image in Paint and upload again. This can take a few tries to get your header the perfect size.
I hope you liked this post! Give it a like on Bloglovin or a +1 on Google Plus if it helped you out. So in this series, I'm going to be telling you how to easily add a background to your blog, add social media icons,etc..Leave a comment down below if there is anything you would like to request but bear in mind that I'm not a blog expert so there are lots of things that I can't do. If you see anything on my blog and want to know how to add it to yours, like a "you might also like" bar or a "follow me on Bloglovin" button at the botttom of every post, then let me know in the comments below and I will do a tutorial.

This post was not sponsored by TCBOTB
although I do go on about it quite a bit :P
Follow on Bloglovin

Monday 23 June 2014

I've Finally Made A Facebook Page!

Hey guys! Just letting you know that I have finally made a Facebook page after months of putting it off. Give the page a like if you want. I will be posting all my new blog posts and videos to it so you can see them all in the one place and don't have to keep going between Blogger and YouTube. Click here to go to my new Facebook page!


Follow on Bloglovin

Friday 20 June 2014

Benefit Bad Lash Mascara Review

Hey guys, so today I'm reviewing Benefit's Bad Gal Lash mascara. I got this a couple of months ago in a travel set so this isn't actually the full sized version. The full sized Bad Gal Lash retails for about €23. As you already may know, I'm a huge fan of one of Benefit's other mascaras, They're Real, so I really wanted to try this one out and see how it compares. 
The brush: The brush is a pretty normal shape for a mascara but one thing that annoys me about it is that it's pretty fat so it almost always end up getting some mascara on my eyelid. Otherwise, it's good for applying mascara to the lashes and works well at separating them too. 

This is a great everyday mascara because it's not too heavy or hard to remove, and it works very well at elongating your lashes. Here are my before and after results:
Before
After

I do like this mascara but it in no way even comes close to They're Real for me. The next time I run out of mascara, They're Real is the one I'll go for, unless I go on the hunt for a much less expensive dupe for it. Click here if you want to read my full review of Benefit's They're Real mascara.

I hope you like this post! Give it a like on Bloglovin if you did. Have you tried out this mascara? What did you think of it? Let me know in the comments below. Also, I just created a Facebook page for my blog and YouTube channel which you can see if you click here. Please give it a like, it would mean a lot to me, and then you will be notified every time I bring out a new blog post or video, and of whatever else I'm doing. 

Follow on Bloglovin

Sunday 15 June 2014

Benefit Hello Flawless Foundation Review

Hey guys, happy father's day! So when I was last in Benefit, I got a couple of free samples with a purchase, one of which was a sample of their Hello Flawless Oxygen Wow foundation. I used it once or twice on holidays because I didn't want to have to bring a big bottle of foundation with me and I found that I loved it. It makes my skin look really radiant and it lasts for ages. In Ireland, it retails at about €36 which is super expensive for a foundation. I don't think that I've ever paid more than €15 for a foundation before, but then I've never tried a high end brand foundation before. This foundation does what it says in the tin and makes my skin look so flawless looking so for that I give it props, but €36 is so much to pay for foundation that I don't know if I would ever actually purchase it. Decide for yourself what you think of this foundation from the before or after pictures below.                                                        
Before the foundation
After applying the foundation
6 hours later

I think this foundation is great and I love the way it sits on my skin but I just feel like there are so many amazing drugstore foundations for less than a third of the price. I think that, since I have pretty good skin anyway, that foundation isn't a product that I need to splurge on every couple of months when I run out. What do you think? Do you like to splurge on your foundation or do you think that the drugstore brands are just as good? Leave a comment down below. 


Follow on Bloglovin

Thursday 12 June 2014

Cool Retro Shades from River Island and Zara


Hey guys, so recently I have noticed that there are some really cool sunglasses around, and if you haven't got any for summer yet then this blog post might be perfect for you. Some of the sunglasses I've seen in River Island and Zara are so cool and retro looking that I just had to show you them. Here are my top 6 pairs of sunglasses that I've seen in the last few week. I'm seriously considering getting either number 1 or number 6, they are just so cool and I love their colours.

1. Aqua Rubber Retro Sunglasses- River Island (€13)
I really love these sunglasses. Their shape and colour are just so cool. These glasses are the most me out of all the sunglasses in this post. They are cool and retro but they are also one of the most wearable shape sunglasses in this blog post and they are also one of the cheapest.

2. Hexagonal Sunglasses- Zara (€19.95)
These sunglasses are such a cool shape. There are really cool looking but not that out there, so you wouldn't have to feel self conscious wearing them like you might with some of the other sunglasses.

3. Zebra Pattern Sunglasses- Zara (€25.95)
I'm not really an animal print person but I think these zebra sunglasses are just so cool. Who wouldn't want a pair of zebra print sunglasses?

4. Pink Colour Block Round Retro Sunglasses- River Island (€13)
I love these multicoloured sunglasses. I've never seen sunglasses like them before I love the pastel pink and blue in these glasses. They are gorgeous!

5. Red Faux Pearl Embellished Cat Eye Sunglasses- River Island (€17)
These sunglasses are class. They are so cool. They remind me of the movie grease and I think they would be perfect if you are dressing up as a pink lady for Halloween. I don't think I could get away with wearing them as everyday sunglasses but there are some other people that definitely could.

6. Rubberized Effect Sunglasses- Zara (€16.95)
I absolutely love these glasses. The light blue colour is gorgeous and the shape is so unique. I'm seriously considering getting these glasses. I try them on every time I'm in the shop because they are so cool. I'm trying to cut down my spending so I can save more but these glasses are trying to sabotage that plan :P

7. Light Pink Cat Eye Sunglasses- River Island (€13)
This is another pair of sunglasses that remind me of the pink ladies. They are so cute, and I love the cat eye shape. They are a great wearable pair of retro sunglasses for this summer.

I hope you liked this post. Leave a comment down below telling me which of the sunglasses from this blog post are your favourite :)


Follow on Bloglovin

Monday 9 June 2014

My Style Crush: Cara Delevingne

Hey guys, today I want to talk to you all about my new style crush, Cara Delevingne. I've only recently came across pictures of her street style, and I have to say that I love it. It's so cool and fun but really relaxed at the same time. She never looks uncomfortable or too cold like I know I would be if I tried to copy another models style. I love how she can incorporate different caps and beanies into her look without looking like a complete idiot.Whenever I wear any sort of hat with an outfit, I instantly feel really self conscious and awkward but she pulls it of perfectly. Here are a couple of pictures where I love her relaxed, casual style:
I would love to rock a cap without looking like a Jay-Z wannabe or some sort of ridiculous trucker but I always end up talking myself out of it. I'm going to try to tell myself more that I am only young once, and that there is no way that I would be able to get away with some of these looks when I am forty, so I might as well have some fun with my fashion while I'm young, without worrying what other people think. What do you guys think? Do you think that caps look stupid and should never be worn, or do you think that you should experiment with fashion while you are still young and can (possibly) get away with it. Leave your answers in the comments below :)

Friday 6 June 2014

Easy Makeup Look Using The Naked 2 Palette

Hey guys! Today I want to show you this week's video on my YouTube channel. It's an easy makeup look using the Naked 2 palette. This video was requested by Sarah but anyone that has a Naked 2 palette can recreate the look. You can also recreate this look with any gold and brown eye shadows that you have. I hope you like this video. If you do please give it a like and subscribe to my channel if you haven't already. So here is the video:


Tuesday 3 June 2014

My Top 5 Benefit Products

Hey guys, today I want to show you my top 5 benefit products. Benefit is one of my favourite high end makeup brands so I've tried a lot of their products since I started using makeup. Their makeup is quite expensive though so there are a good number of their products that I haven't tried yet because I just haven't had that amount of money to spend on makeup while I'm saving up for more college. These products are my top 5 out of the ones I've tried out so far.

1. They're Real mascara (€27 in Brown Thomas)
This is my favourite mascara ever. I've talked about it loads of times on my blog and have even done an entire blog post about it which you can read here. Basically, it just makes my lashes look so amazing and does actually have that fake lash feeling of looking out from your really long lashes when you first apply it. I have never found a mascara that works as good as it for me.

2. The Porefessional Face Primer  (€35 in Brown Thomas)
This is a great primer that evens out your complexion and keeps your makeup on all day. I also find it really great for dry skin unlike some other primers (That Gal, I'm looking at you :P). Read my full blog post about it here.

3. Sugarbomb Face Powder (€34 in Debenhams)
This is such a gorgeous colour for your cheeks for the summer months. The four colours combined create a gorgeous sort of peachy colour. This is my favourite of the Benefit Box O' Powders that I have tried, mainly because of the colour. I just love it. Read my full blog post about it here.

4. Erase Paste Concealer (€27.50 in Debenhams)
As you may know by reading my other blog posts, I find it really hard to get a great concealer to cover my dark under eye circles but this one is one of the best that I have found so far. It has quite a thick consistency so I find that it works quite well at covering them. I'm pretty sure that I will repurchase it as soon as I run out of it but I have the small travel jar and there is still loads left in it because it takes quite a long time to use up so that mightn't be for a while yet.

5. High Beam Highlighter (€27.50 at Debenhams)
I really love the effect that this highlighter gives to your skin. It's just so gorgeous and makes your skin really dewy looking. A bottle of this lasts so long too which is great so you don't have to repurchase it for ages. Read my full review of this product here.

So those are my top 5 benefit products. I hope you liked this post. Please give it a like on Bloglovin if you did, and make sure to tell me in the comments below what your favourite Benefit product is :)

Follow on Bloglovin